Features
Borders that print around every photo
Design custom photo booth print borders in Punchframe: add names and a date, pick colors, and preview the border on your real cut size before the event.
Updated
The problem
A plain photo on a keychain is nice. A photo with the couple's names or the company name printed in a ring around it is a keepsake people keep. Most operators build that ring as a PNG overlay in a design app, then find out at the event that the text sits under the punch or the border is too thick for the cutter. Custom photo booth print borders only work if they are drawn for the exact size you cut, so Punchframe lets you design them in the same software you print from. It is not a pack of template files to download for another program.
Clients also want to see the design before the event, and every change means going back to the design app and exporting again.
How to design custom photo booth print borders in Punchframe
The border editor sits in the event settings. It draws the border from your cutter size, so what you see in the preview is what prints.
Start from a template
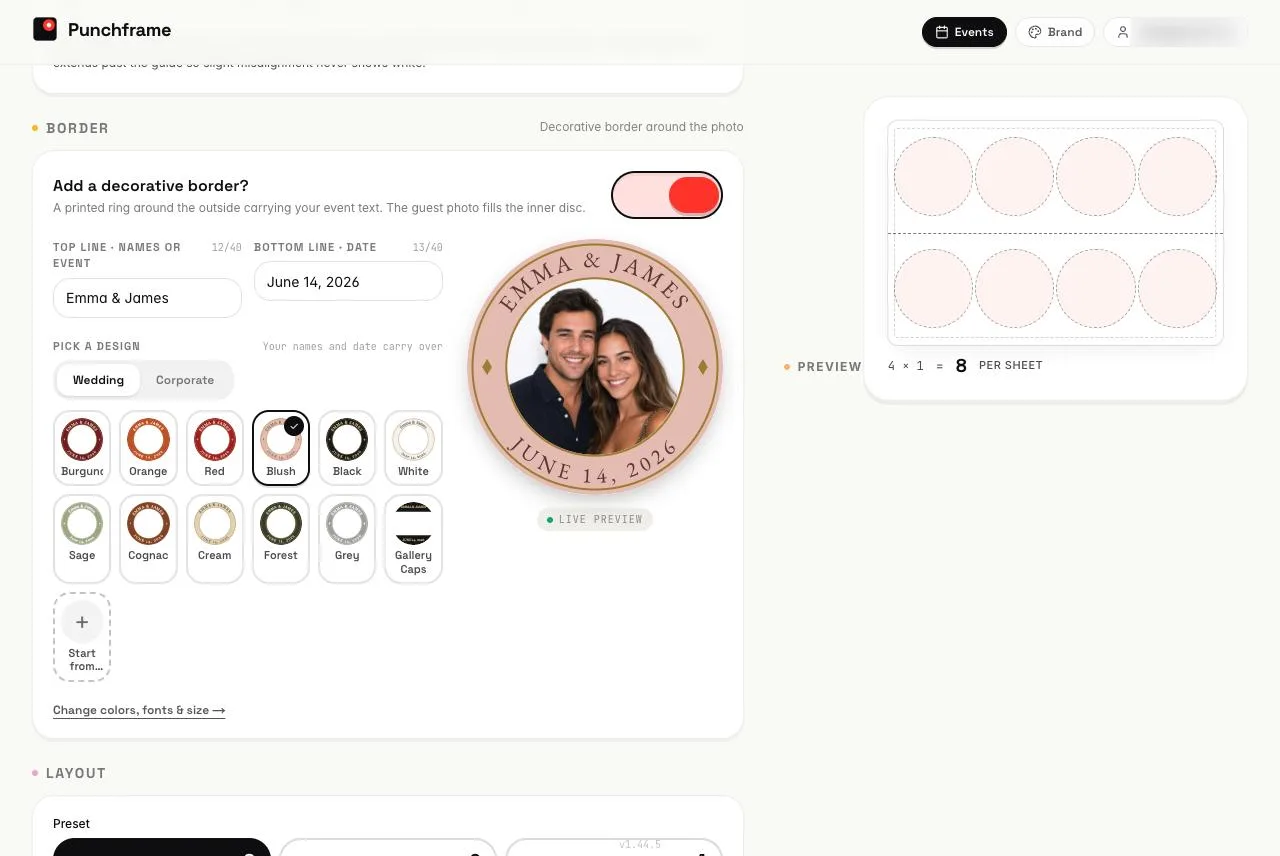
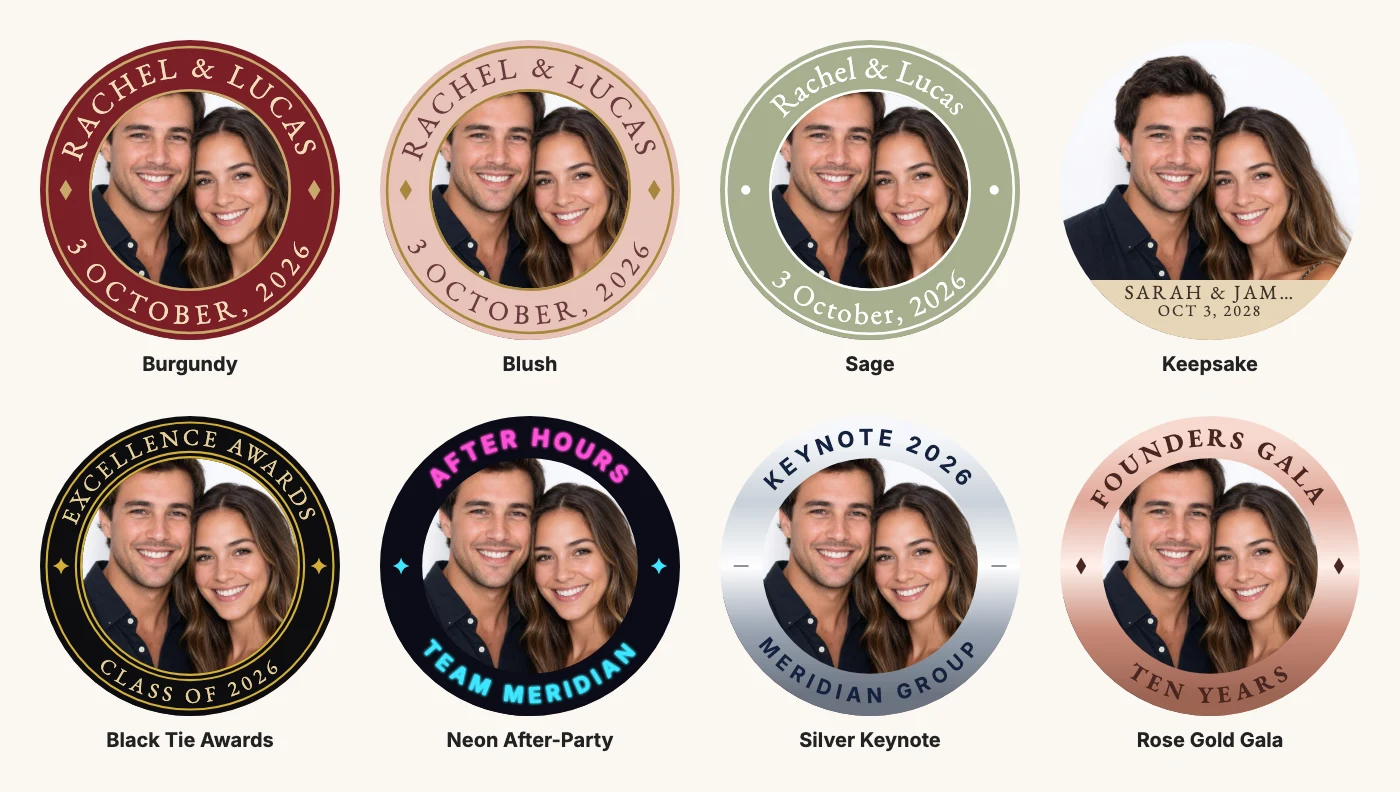
Pick a design from the Wedding or Corporate tab. Wedding templates include colors like Burgundy, Sage, Blush and Forest. Corporate templates include looks like Boardroom Navy, Black Tie Awards and Gold Foil Gala. Your names and date carry over when you switch between designs, so you can try several without retyping.
Add your words
The border has a top line for names or the event name and a bottom line for the date, each up to 40 characters. Some styles repeat one phrase all the way around instead. You choose the font, bold or regular lettering, upper case or as typed, and a small ornament such as a dot, heart or star between the two lines. Text size is capped so the words fit the border.
Choose the style and colors
Punchframe border styles range from simple to decorative: solid color, a thin keyline ring, a soft tint, gold, silver or rose-gold foil, two-tone, confetti, bevel, a diagonal sweep and pinstripes. Text color can be set automatically, which picks dark lettering on light parts of the border and light lettering on dark parts. You can also add thin hairline rules along the border edges.
Check the fit before you print
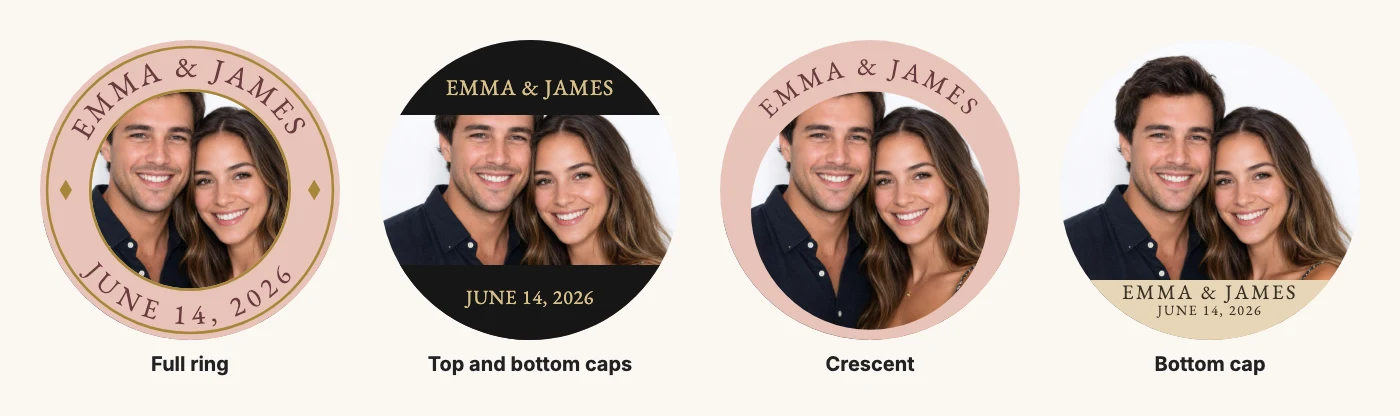
Punchframe's border editor shows the fit before anything prints. You set the border thickness with a slider, and the editor shows the cut diameter, the border width and the photo diameter that is left in the middle. You can place the border as a full ring, as two caps at the top and bottom that leave the whole circle for the photo, or as a crescent that is thick at the top and tapers to a thin rim, which you can rotate. For two-sided keychains you decide whether the border prints on the back as well. Printed borders are available for circle cutters.
It is applied to every photo
Punchframe applies the printed border to every photo on the sheet. Once the border is on, the framing dialog and the guest portal both show it around the photo while cropping, so the photo is framed inside the border. At print time the border is added to every slot on the sheet.
At a real event
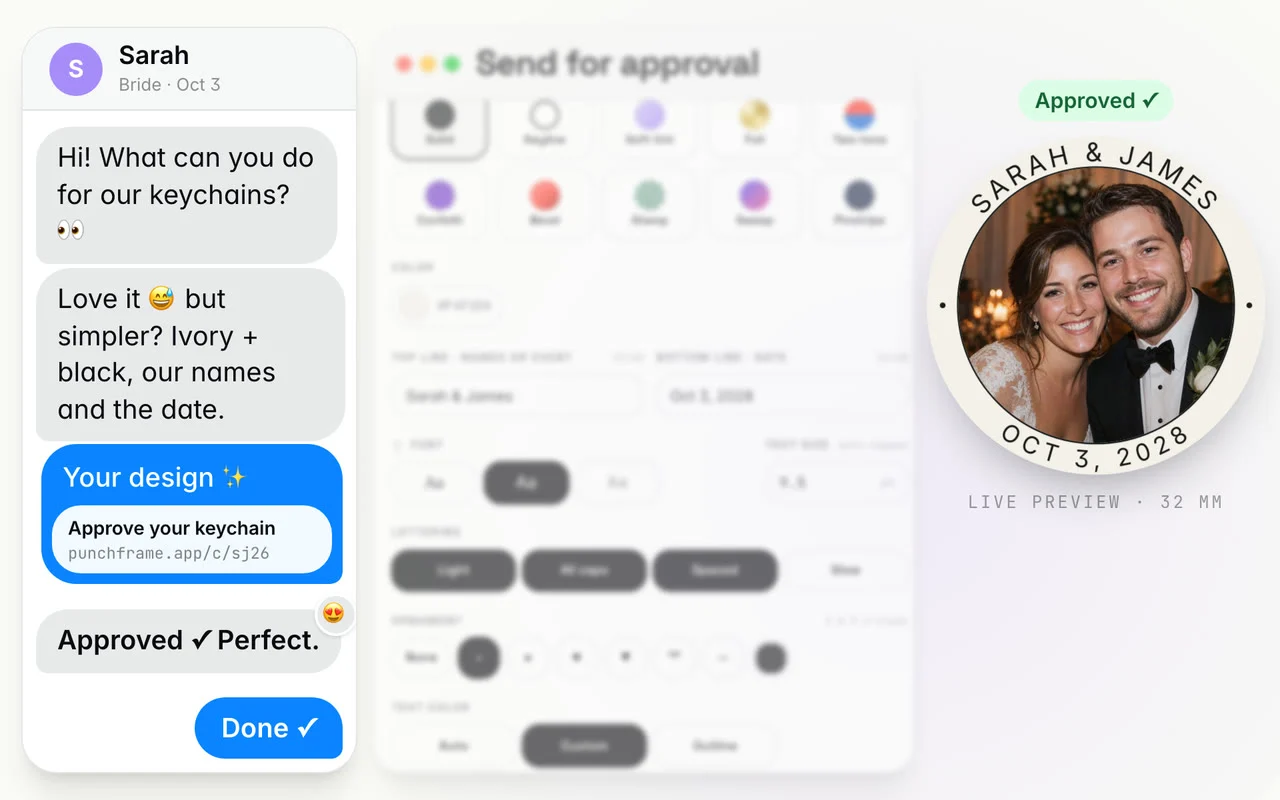
Here is how Punchframe printed borders fit a wedding booking. Instead of designing the border yourself, you send the couple a client design link. They pick a style, choose colors and type their names and date, then approve. The approved border is saved onto your event, so there is nothing to export or re-upload.
On the day, every photo you frame on the run screen shows the border around it, and guests who upload from their phones see the same border while they crop. When you print, the border is added to every slot on the keychain sheet, sized to the cutter you set for the event.
Common problems
- The photo looks too small inside the ring. Lower the border thickness, or switch the placement to caps or a crescent, which leave more of the circle for the photo.
- The text looks cramped. Each line holds up to 40 characters, and the text size shrinks to fit the border. Shorter wording prints larger.
- The border colors will not change. After a client approves a design, the colors you offer them are locked. Use Change approved colors on the event's client link panel, or reopen the design so the client can edit it.
- Prints show a watermark. Prints on the free Demo plan carry a watermark. Upgrade to Business to print borders without it.
Who it's for
Punchframe's custom print borders suit any event with a name, a date or a brand to show:
- Wedding photo booths
- Corporate event activations
- Bar and bat mitzvahs
- Trade-show booths
- Party favor businesses
- Brand pop-ups
You can try borders on the free Demo plan, where prints carry a watermark. The Business plan prints them without a watermark.
Questions
Can I put the couple's names and wedding date on a photo keychain?
Yes. Type the names on the top line and the date on the bottom line. Both follow the curve of the border.
Will the border text get cut off by my punch?
The border is drawn from the cut size you set for the event, and the editor shows how much room is left for the photo. The text size is capped to fit inside the border.
Can my client choose the border design?
Yes. Send them a client design link and they can pick the style, colors and wording themselves, then approve it. The approved design is saved to your event.
Can I print different border colors to match different keychain straps?
Yes, when your client picks more than one color through the client design link. The run screen shows which border color each slot will print in.